Monday, July 9, 2012

Puppy Birthday Party


Back in May my oldest turned six.  She is my animal lover, all things horses, kitties and puppies!  She wanted a puppy party and loves pink so it started out as a pink poodle party but morphed into a puppy party after we found these darling TY puppies at Hobby Lobby.  


This is Alexandra.  She is a very curious child, always thinking deeper than I would expect.  She is always asking thought provoking questions.  For example, today she asked me what was more "importanter" a dog or a jewelry box, a horse or a car?  Well, I told her, it depends on the person.  Get what i mean?  I love her so much, she learned how to whistle 6 months ago and now she whistles ALL. THE. TIME.  At night I have to tell her that she's met her whistling quota for the day.  She is such a great helper and a pretty obedient child (less since she turned 6).   Oh and she is completely boy crazy!!!  Yikers.

Her birthday party was a complete hit with her friends.  To decorate the table I used the same idea for the place settings as I did for Sam's Mermaid party, layering with paper and doilies.  


The girls were SO excited when they showed up and found a puppy at the table that they got to adopt.  

This is Samantha, she is so in love and look, they have the same eyes!  After they adopted their puppy they gave them a name and made a dog tag.


Puppy vitamins.  Another fun idea.  I am totally into making things exciting for kids parties but I also love quick and easy!  I'm not that great on the computer and I didn't have time to figure it out so I just wrote all the tags by hand and added some embellishments to make it look pretty.  Lame, I know.  But they didn't care so neither should I.  Speaking of easy, for an activity I gave them all sparkly bouncy balls to take their new pets to the "park" aka my family room and play.  They could have played the rest of the party, running around acting like dogs themselves - it was perfect!


Cocoa Puffs.  Brilliant I know, but it wasn't my idea.  I got the entire party idea from this cute blog.


I used candy molds from Hobby Lobby to make the paws.  A simple way to carry the theme out in the cake/cupcakes.  I'm all about simple these days, refer to here.

In fact, I used a birthday garland I made two years ago for her pony party and the black, white and pink fabric garland hangs in her room as decor.  I love re-using stuff like that.  


I had to tweak the wording from the invitation that inspired me to rhyme with Alex's age.  I think they turned out really cute and they were so easy to design in Word and stick these cute stickers on them that my daughter had picked out at the store.  All in all I think I planned some great details for the party but didn't feel overwhelmed putting it all together!


Here's to making parties fun and easy!

xo
Melanie

Tuesday, July 3, 2012

I'm a patriot


I love holidays.  As a kid I was the first to get out our holiday decorations and set them out.  It brought me pure joy to have our home decorated for the holidays.  And now with my own home I go a little overboard and deck out alot of spaces in my home with holiday decor. 
 It warms my heart.  


I made this pendant garland for the month of July and love it hanging over my front porch!  These garlands are super easy.  Make a triangle the size you want, double the fabric and cut out, sew the sides together right sides in, then turn right sides out, iron and sew them into double wide bias tape.  I swear I have garlands for almost every occasion, easy, inexpensive and really festive!


I love seeing it out my front windows, it makes me think there is a party going on inside my home.  Which there usually is.  


I hope you all have the chance to sing the Star Spangled Banner this week, I did on Sunday and by the 3rd verse I always get a little choked up.  I am so proud to be an American and grateful for the Founding Fathers and their wisdom in writing the Constitution and for the freedoms we enjoy.  
God bless the USA!!
I hope you all have a happy Fourth of July!!  


Melanie

Monday, July 2, 2012

So...I've been building a float


Well, it's been a couple of months of pure craziness around here.  I've been building a float for the Days of '47 Parade that takes place on July 24th which is Pioneer Day here in Utah.  As a Mormon, I belong to a large congregation in my neighborhood called a Stake.  Our stake has been assigned to participate in the parade with a float.  My "calling" or area I give service to is the Cultural Arts in my stake.  The float falls under my calling.  So, since last September we have been working on this float.  It all started with a few design concepts and we narrowed it down to "The Family Dream Machine".  We started actually building it in February and it has taken ALOT of my extra time.  I am so thrilled with the finished product and am so grateful for all the people that gave so much of their time and talent to this project!  We couldn't have done it without them.  Anyway, after the 24th I will post more pictures of the entire thing with the amazing costumes that the youth will be wearing while walking in the parade.  I'm on the home stretch and then will be back blogging regularly, yay!

                                                                                xo
                                                                            Melanie

Tuesday, May 1, 2012

Kennecott - the mine and Daybreak


I'm a native Utah girl.  And I'm a little ashamed to say that this was the first time I had visited the Kennecott Copper Mine!  We had ventured out on Saturday to buy some new trees and plants for our yard but the nursery we wanted to get them was closed.  So instead, we spent $5 and visited the copper mine that is in our backyard!  It was amazing to see how big the pit is and how huge the trucks are!  My girls enjoyed looking thru the museum at all the old and new mining equipment and stuff.  If you want to do a little sight seeing this month, it's the perfect time to go because admission is FREE!  Check out their website for details.


So I know I mentioned this before but I am attending this blogger event this weekend and couldn't be more excited to meet new friends, take classes, get swag and hang with some cool sponsors!

Some of the sponsors include the following:
Hotel Monaco - a cool hotel in SLC
Goldilocks Ride - a womens only bike ride/race
Flirty Aprons - cook with flair!
Oh Sweet Sadie! - a darling boutique here in Daybreak
Daybreak....I of course l.o.v.e Daybreak because this is where I live!  


Not my house, but one of my favorites in the hood.


This is what I do most mornings, it's heavenly running around the lake.


"The beach park"...my kids love it!


Melanie


Thursday, April 19, 2012

Lemon Cupcakes and a retreat for me!


Why is it that everything lemon is so tasty?  The zesty sweet citrus flavor is one of my favorites, next to coconut of course.  My cute friend and neighbor Christin made this recipe for our neighborhood recipe group back in February, and I think I ate three slices of cake!

I decided to do a cupcake version so I could take some to our new neighbors that just moved in and for portion control for me and my family.  They did turn out a little messy with the cupcake liners so next time I make this recipe I will probably do it in a 9 x 13 but they did look cool with glaze dripping on the wrapper.  And as always, I froze half of the finished goodies so I wouldn't be compelled to eat them before they go bad.  


Shh...don't tell my trainer Jill, but this little cupcake has so much flavor and is so great tasting it was worth cheating just a little on my diet!

Here's the recipe:

1 Lemon or Yellow cake mix 
  (I used yellow because it's what I had on hand and I couldn't taste the difference.)
1 Lemon Jello Pudding mix (small size)
1/4 C. Flour
1 C. Water
3/4 C. Oil
4 Eggs
1 Tbsp. Lemon Extract
3 Cups Powdered Sugar
8 Tbsp. Lemon Juice

Mix cake mix, jello and flour.  In a separate bowl mix water, oil, 4 eggs and lemon extract.  Combine and pour into cupcake liners or 9 x 13 greased pan.  Bake at 350 for 16-20 mins for cupcakes and 20-30 mins for 9 x 13.  Remove from oven and bump cake pan to make cake fall.  Poke holes in cake.  I used a straw.  Mix powdered sugar and lemon juice together and pour over warm cake.  Let cool and enjoy!


I have some happy news, I'm attending the Breathing Space blogger retreat in May and I couldn't be more excited to be surrounded by talented people and attend some amazing classes!


And the best part?  It's being held in my hood...


Can't wait to share all the fun things I get to do with you!

xo
Mel


Wednesday, April 18, 2012

Guest Post: Jenny Meese


Hello everyone.  As a huge fan of Aristocrafty, I’m so excited to guest blog today.  Like many of you, I have taken to Pinterest for inspiration. Every so often I cross something that screams “MAKE ME!” Every full moon, I try one of these projects.  Some fail, but some TURN OUT.  Here’s one that could turn out for you. 


                                                                 (This is my finished product!)

I saw THIS on Pinterest and was hooked.  I enlisted my husband and went to Home Depot to scan through the sea of colors.  We ended up purchasing several of the little 8 oz. paint samplers at the counter ($3.00 ea.) Picking and painting bold colors is just good for the soul! 

Supply list:
5 - 2x4’s to cut for colored slats. We had extra and were glad since we made some mistakes.
2 – 2x6’s for skirt around bench
2 – 4x4’s legs
Sandpaper. 
Paint and brushes

We measured and cut the wood.  No fancy measurements, just figure how long, how high and how deep, etc.  Our cuts were a bit rough so we sanded a little to soften things up.  After painting, we secured the bench by screwing the corners of the skirt into the legs.  The skirt screws pretty much disappear with a little touch up paint.


We also wanted to hide the screws on the sitting area.  It’s easier to SEE how we did it by looking at this picture, rather than describe it.  (You’re looking at the underside of the sitting area.  A place nobody but you will ever see.)  Just make sure the screws you have are long enough to go up through the first 2x4 but only ½ way through the colored one.


The bench is heavy, sturdy and so much fun!  Our kids play on it all day and I love looking out back and seeing so many colors in the yard.  I could even see myself changing it up in a few years with different blues and turquoise pastels for a traditional beach look. But maybe that’s another project. So many possibilities…this bench and I were meant to be!

I hope that you’ll build one and please PIN it!

Jenny

Wednesday, April 4, 2012

Mermaid Birthday Party


My sweet little Samantha turns four this week, to celebrate we threw a Mermaid Party!  Aerial is her favorite princess but I didn't want to throw a Disney party.  My friend Aymee had thrown a mermaid party for her little girl the week before so I borrowed most of her stuff.  She saved me so much time and money! On a side note:  I think we need to do party exchanges or something like that because we all spend so much time making decorations and stuff and then it gets used once!  Who's with me??  


My friend inspired my simple design for the invitations, they were really easy to make and I printed everything at home or cut out on my Cricut.  


The scalloped banners were borrowed and the happy birthday garland was from last year's Rapunzel birthday party, I was really happy the colors worked for this party!


This little table and chair set-up is a birthday tradition at our house.  We move out our dining table and bring in this.  I think it's so cozy and quaint for the kids.  You can see the hanging ruffled crepe paper, it's suppose to look like kelp.  


I think my cupcakes turned out pretty cute!  I made the candy shells out of a mold set I found at Hobby Lobby in these three colors.  I used brown sugar as sand on top of my blue buttercream frosting.  (The brown sugar was my friend's idea.)


The pink coral is from Wal-Mart's pet section, again, not my idea!


The party favors, a pearl necklace, lip gloss, a ring and bubbles!  We also had an Aerial pinata and played some simple but fun games while we waited for Aerial to show-up!  Freeze dance to The Little Mermaid songs and pass the beach ball.


Happy Birthday to my precious little Sammy girl!  

Mel


Monday, April 2, 2012

Quick and Easy Cinnamon Rolls


Growing up my mom made cinnamon rolls a couple times a year on a Sunday.  They were delicious and they took about four hours to make, a long and laborious process!  I know because I've made them myself and I can't usually wait that long.  
I just bought a huge bag of  frozen Rhodes Rolls from Costco and figured I could use that dough.   

First off, thaw 1 dozen rolls but don't let them rise.  This will take less than an hour.  Mush them all together into one big dough ball and then roll it out on your flour dusted counter into a rectangle.


This is the good part! 
1/2 cup brown sugar
  1/2 cup sugar
1 tablespoon cinnamon
1/2 cup butter melted

Pour 2/3 of the melted butter onto the rectangle and spread, then sprinkle the sugars and cinnamon after combined all over and roll it up and pinch the loaf closed.  Then slice the loaf into 1" rolls using heavy duty thread or a serrated knife.


Spray a 9 x 13 pan with non-stick spray and lay the rolls in the pan and cover with plastic wrap that has been sprayed with non-stick spray.  Let rise until double in size.

Pour remaining butter over top and bake at 350 degrees for 18-20 mins.  

Cover with glaze.  Eat warm and enjoy the yummy goodness!

Glaze Recipe
2 cups powdered sugar
4 Tbsp melted butter
2 tsp. vanilla
3-6 Tbsp warm water

Whisk together and pour over cinnamon rolls.

xo
Melanie


Friday, March 30, 2012

Everyone's Favorite Chocolate Chip Cookie


    I was at lunch with some old friends yesterday.  We were discussing our favorite treats among many other things.  Of course we all love mini Cadbury eggs but classic old Chocolate Chip Cookies was a winner.  Now these cookies are not going to change the world but I guarantee you will love this recipe as much as my family does.
    A few things I think make these cookies the best are real butter, Mexican vanilla and Guitard milk chocolate chips(they are slightly larger than regular chocolate chips).  I also personally prefer semi-sweet but my husband loves milk chocolate.  Another fun choice is to do half milk chocolate and half butterscotch.

Everyone's Favorite Chocolate Chip Cookie

1 cup butter (yes real butter)
3/4 cup brown sugar
3/4 cup granulated sugar
1 egg
1 teaspoon vanilla ( I use Mexican Vanilla)

2 1/4 cups flour
1 teaspoon  baking soda
1/2 teaspoon salt

2/3 of a bag of chocolate chips
1/2 cup of walnuts (optional)

Cream together butter and sugars, add egg and vanilla.  
Sift together flour, salt and baking soda.  Mix into butter mixture.  Add chocolate chips and nuts.

Preheat oven to 375 degrees.  Bake for about 10 min.

 enjoy!

                   xo, Tami


Monday, March 26, 2012

Lime Is Divine


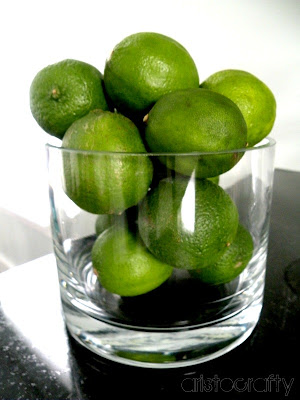
Do you shop Costco?  And do you buy stuff that you can't possibly go thru in a week before it goes bad?  We do too.  Now, if I had two more kids or bigger kids with bigger appetites I would probably be ok.  We bought a bag limes last weekend to make our lime beef roast and hadn't touched them since.  So, today I thought I'd use them up before they go hard and make my husband's favorite dish, Honey-Lime Enchiladas from The Sisters Cafe blog.  I found the recipe over a year ago and make it every once in a while when I really want to spoil Chris. (wink wink!)  Then for dessert I tried a new recipe I found on Pinterest.  And can you say YUM!


Honey Lime Enchiladas

6 Tbsp Honey
4 1/2 Tbsp Lime Juice
1 Tbsp Chili Powder - I do a little less for my kids.
1/2 Tsp Garlic Powder

1 lb. Cooked Chicken, shredded
Flour Tortillas
Shredded Cheese
10 oz. can Green Enchilada Sauce

Mix first 4 ingredients together and toss with shredded chicken.  Let it marinate for atleast a half hour.  Lightly grease a 9x13 pan.  Fill flour tortillas with chicken and cheese.  Pour enchilada sauce over enchiladas and sprinkle with more cheese.  Bake at 350 degrees for 30 mins.  Put it under the broiler at the end to make the cheese brown and crispy on the top.  I always forget to do this!


Lime and Coconut Crumble Bars


We love lime and coconut at our house so this is the perfect little number for us!  It's quick to make and was a nice Sunday dessert.  I think it would be even better with a small scoop of vanilla bean ice cream!  Click here to find the recipe.

                                                                            xo
                                                                       Melanie,
                                                                   lover of lime.

Sunday, March 25, 2012

Happy Anniversary

                                                                       (It was a spring blizzard and I had to scan this photo....so it's not quite clear.)

Today we've been married seven years!  I had someone ask me if I had the "7year itch".  It's quite the opposite.  Over the years I've been grateful for Chris, but lately I am more grateful than ever for my husband!  He's a real stand-up guy.  Full of integrity, character, wisdom, intelligence and humor!  I once said when we were engaged that I love that he makes me laugh.  Really laugh. Like tears roll down your eyes laugh!   It's why I fell in love with him at first.  And he still makes me laugh.  We were laughing the other day with my SIL and she said "do you guys always laugh like this?"  YES!  Honestly, being married to Chris is so delightful.  Of course, we aren't exempt of trials and rough spots but we seem to get thru them stronger than before and hopefully better.  Happy Anniversary Babe!  I'm one lucky girl! xoxoxo


                                                                               (My kids bent this picture......gotta love how kids ruin your stuff!)